




Outdoor Kitchen Remodel: The Mohrman Family Trades a Store-Bought Oven for a Mattone Cupola
Their store-bought oven would never stay hot. So an Ohio couple pulled it out, cast a Mattone Cupola themselves, and set it right back into their curved brick outdoor kitchen. Every step is here, in 17 photos.

- Built By
- The Mohrman Family
- Location
- Ohio
- Oven Style
- Castable Refractory Dome
- Photos & Videos
- 17 Photos
- Homeowner Review
- ★★★★★
Build Time-Lapse
Watch This Outdoor Kitchen Remodel Come Together
From a freshly cast dome to a finished oven in a brick kitchen, in about 32 seconds. Press play, or grab the slider and scrub through the build yourself.

Forrest and Barb Mohrman already had a beautiful outdoor kitchen: curved red brick, granite counters, a gas grill and a white pergola. What they did not have was an oven that worked. Their store-bought oven was small, hard to heat and would not hold a fire. So they found BrickWood, cast a Mattone Cupola themselves and swapped it in. “I am not a mason,” Forrest says. “Just a Jack of all trades.”
Step 1 of 6
Casting the Dome (and a Plastic Wrap Trick)
Forrest and Barb covered the whole foam form in strips of kitchen plastic wrap, held at the corners with tiny pieces of duct tape, including the door and chimney areas. Barb’s idea. Barb tamped the refractory in with a blunt wood dowel so there were no air pockets, and Forrest cast in a stainless tube for a long oven thermometer plus rods for lifting. To demold, he drilled a tiny hole, blew compressed air into the form while the dome hung from a hoist, and tapped it with a mallet and a wood plank. The foam came free in one piece, and he saved it.
“Actually the plastic wrap was my wife’s idea.”
Forrest Mohrman

Step 2 of 6
Out With the Store-Bought Oven
The old store-bought oven came out, and Forrest found the real problem: the insulation around it was soaking wet because the stucco had never been waterproofed. He built the new firebrick cooking surface on a 5/8-inch steel diamond plate, set the dome on top, and lifted the whole assembly onto the old foundation. It fit with just a little overhang.
“Just could not seem to get the oven hot and stay hot to cook 10 pizzas in a row.”
Forrest Mohrman


Step 3 of 6
Insulation and Wire Mesh, Done Right
After seeing what water did to the old oven, Forrest took his time here. A full blanket of insulation went over the dome, then wire mesh to hold the stucco.
“This is the most important part of any oven of this nature.”
Forrest Mohrman


Step 4 of 6
Three Coats of Stucco and a Brick Arch
Forrest mixed his own stucco: 2 parts portland cement, 1 part hydrated lime and 3 parts sand. He kept every coat to 1/4 inch or less so it would not crack, and kept it damp under towels for several days. The first two coats are gray. The last one was tinted to match the brick in the kitchen. A red brick arch, laid over a plywood form, ties the front to the rest of the kitchen.


Step 5 of 6
Seven Days of Curing Fires
He waited 4 to 5 days, then started with small, low fires to drive the water out of the refractory and stucco. “It was amazing how much steam you could see escape.” Each day the fires got a little hotter for 7 days. Before the first cook he took it up to 800 to 1,000 degrees to burn off any last bits of plastic wrap. The thermometer in the arch reads the dome temperature through that cast-in tube.
“On the night we cooked for the first time I could not believe how easy this oven was to cook with.”
Forrest Mohrman


Step 6 of 6
A Remodeled Outdoor Kitchen
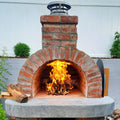
The finished oven sits right where the old one did, in the curved brick kitchen under the pergola, next to the gas grill, with granite counters on both sides and an arched firewood niche below.


Hover over the dots (or tap them on your phone) to see what went into this outdoor kitchen remodel.
- Stainless ChimneyA stainless exhaust extension carries the smoke up past the pergola.
- White PergolaShade over the whole kitchen, oven and grill.
- Red Brick ArchLaid over a plywood form to match the brick kitchen.
- Tinted Stucco DomeThree thin coats over insulation and wire mesh. The last coat is tinted to match the brick.
- Firewood Within ReachSplit wood stacked right on the counter beside the oven.
- Granite CountersPrep space on both sides of the oven.
- Arched Firewood NicheAn arched opening in the brick base keeps the wood dry.

 Mid-BuildFinished
Drag across the photo (or just move your mouse) to go from the insulated dome to the finished oven.
Forrest’s Advice for Your Build
Keep the insulation dry. “The insulation over the dome is very critical and must never get wet with rain.” Wet insulation is what ruined their first oven.
Waterproof with stucco. Three coats, each no more than 1/4 inch thick, kept damp for several days so they cure without cracking.
Wrap the form in plastic. About 95% of the plastic peeled away after demolding, and the rest burned off during the curing fires.
Cure it slowly. Wait 4 to 5 days, then build hotter fires each day for a week.
When in doubt, go bigger. “In my opinion go with a larger oven when in doubt.” More room for the fire and the food was the whole reason for the remodel.
Sweat the small stuff. “Pay attention to the small details and you too can have a great oven to cook with.”
Good Questions
Outdoor Kitchen Remodel FAQ
What should I look for before an outdoor kitchen remodel that replaces an oven?
Check the insulation and the stucco. When the Mohrmans pulled out their store-bought oven, the insulation was soaking wet because the stucco was never waterproofed. The oven was always steaming off water, which is a big part of why it would not stay hot.
Can a new oven go on the old oven’s base?
In this case, yes. Forrest built the firebrick cooking surface on a 5/8-inch steel plate, set the cast dome on it, and lifted the whole thing onto the old foundation. It overhangs a little, and the foundation carries it fine.
How do you get the foam form out of cast refractory?
Forrest wrapped the form in plastic wrap before casting. To demold, he blew compressed air through a tiny hole while the dome was hanging, and tapped it with a mallet against a wood plank to spread the force. The form came out whole.
How long did curing take?
He waited 4 to 5 days after casting, then fired it for 7 days with gradually hotter fires. See how to cure your oven for our full schedule.
How well does it hold heat?
After a night of cooking, Forrest closed it up with a stainless door. It read 350 degrees the next morning and 220 degrees that evening.
Do I need to be a mason?
No. “I am not a mason. Just a Jack of all trades,” Forrest says, and “this is not rocket science.” Our FREE plans walk you through each step.
In Their Own Words
The Mohrman Family · Ohio★★★★★
Over this past summer, I cast the Brickwood Mattone Cupola refractory cement oven and retrofitted it in place of a purchased oven we removed. We are more than pleased with the way it cooks and maintains a fire.
The purchased oven we bought was much smaller and was very hard to get hot and maintain a fire. With your Cupola oven we now have, it is very easy to get a roaring fire going and has plenty of cooking room. Heck, you can do an entire dinner in the oven.
We cannot thank you enough for providing the public with such a great design. Thanks again! 5 stars!
Your Turn
Give Your Outdoor Kitchen an Oven That Works
Forrest and Barb had never cast an oven before, and theirs now holds 350 degrees overnight. Every one starts with the same kit and plans. Start with our free plans and materials list, then finish it your way. Ready to start? See the Mattone Cupola, or compare all of our pizza oven kits.


