






Arizona Backyard Ideas: The Chandler Family’s Poolside Pizza Oven in Phoenix
First-time builders cut down an orange tree, then spent every weekend of a Phoenix summer building a dark brick barrel oven beside the pool. Every step is here, in 76 photos.

- Built By
- The A. Chandler Family
- Location
- Arizona
- Oven Style
- Fire Brick Barrel
- Photos & Videos
- 76 Photos
- Homeowner Review
- ★★★★★
Build Time-Lapse
Watch This Arizona Backyard Oven Get Built
From an orange tree by the pool to a finished oven, in about 93 seconds. Press play, or grab the slider and scrub through the build yourself.

The Chandlers learned to make pizza on a pizza attachment for their kettle grill. They loved it, but it wasn’t a real pizza oven. They shopped for a prefab oven next, but every one they liked was too expensive. So they found BrickWood, picked a spot by the pool in their Phoenix backyard, and built a Mattone Barile Grande themselves, with zero experience in concrete or brick. They took a lot of pictures along the way, so this is one of the most complete builds on our blog.
Step 1 of 8
Out With the Orange Tree
Where would they build it, and how? The only place in the backyard they could both agree on was a corner by the pool, right where their beautiful orange tree was growing. So in July, they made the call: pizza over orange juice. The tree came down and the spot was cleared for the oven.
“The only place in our backyard we could agree on to build it was where our beautiful orange tree was growing.”
The Chandler Family


Step 2 of 8
A Concrete Slab in the Desert
Next came a wood form, a tamped gravel base and a rented mixer. They poured and finished the slab, let it cure, then marked out where the block base would go.
“We had to learn everything the hard way. We rented and bought lots of tools as well.”
The Chandler Family


Step 3 of 8
Building the Block Base
The block went up in a U shape, leaving an open bay underneath for firewood. The family dog checked every course.
“The wife and I ‘had’ zero experience in concrete work or brick laying.”
The Chandler Family


Step 4 of 8
Hearth Slabs and a Herringbone Firebrick Cooking Surface
They built the hearth forms in the garage ahead of time, cast the slabs on the driveway and set them on the block. An insulating layer went on top, then the hearth was wrapped in plastic so it would cure slowly in the desert heat. A brick border and a herringbone firebrick cooking surface finished it off.


Step 5 of 8
Raising the Firebrick Barrel
The firebrick back wall and chimney form went up first. Then row by row, the barrel took shape over the BrickWood foam form, with the arch at the front.


Step 6 of 8
Insulation, Lath and Stucco
The barrel got a parge coat, a wrap of insulation blanket and wire lath, then a scratch coat. The block base got corner bead and stucco, smoothed and sponge-finished.
“We made an incredible mess, had a lot of fun...”
The Chandler Family


Step 7 of 8
Dark Brick, Talavera Tile and a Copper Cap
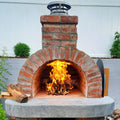
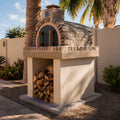
This is where the Arizona backyard look came together: a Talavera tile set into the brick chimney, dark multi-tone brick over the barrel, a brick arch, a copper chimney cap, and a fresh coat of paint on the stucco base.


Hover over the dots (or tap them on your phone) to see what makes this Arizona backyard oven one of a kind.
- Copper Chimney CapA warm copper cap tops the brick chimney.
- Talavera TileA hand-painted tile set into the chimney.
- Dark Brick BarrelMulti-tone brick veneer over the insulated firebrick barrel.
- Brick Arch & DoorA brick arch frames the opening and its door.
- Firewood StorageThe open bay in the block base keeps firewood dry and handy.
- Tan Stucco BaseStucco over block, painted to match the desert backyard.
- Desert LandscapingPalms, cactus and gravel finish the corner by the pool.
Step 8 of 8
Ready for Pizza Season
They started building on August 2 and baked their first pizza on November 2, three months to the day and just in time for the cooler months. It took every weekend, plus several vacation days. With desert landscaping, palms and a stack of firewood underneath, it is the centerpiece of the backyard. And the orange tree? They planted a new one.
“It’s a big job. Buying an oven is WAY easier. But, it’s so worth it to build one if you can.”
The Chandler Family


 BeforeFinished
Drag across the photo (or just move your mouse) to go from the cleared corner where the orange tree stood to the finished oven.
Good Questions
Arizona Backyard Ideas FAQ
What are good Arizona backyard ideas for outdoor cooking?
A brick barrel oven by the pool is hard to beat. The Chandlers paired dark brick with a tan stucco base, a Talavera tile and a copper chimney cap, then finished the corner with palms, cactus and gravel. The open base doubles as firewood storage.
Can you build a pizza oven in the Phoenix summer heat?
Yes. The Chandlers built theirs from August into the fall so it would be ready for the cooler months. They wrapped the fresh hearth in plastic so it would cure slowly instead of drying out too fast in the heat. Their honest take: starting in the hottest part of the year was “probably not a great idea in hindsight.” If you can, start in the spring or fall.
How long did this build take?
They worked every weekend, plus several vacation days, for about two months. They started building on August 2 and baked their first pizza on November 2.
Which BrickWood oven did the Chandlers build?
The Mattone Barile Grande, our best-selling firebrick barrel oven. It feeds 1 to 20 guests, holds three 10-inch pizzas at once and has an 18.5-inch interior ceiling. They built it from Mattone Barile Grande · Package 2.
Do I need masonry experience to build one?
No. The Chandlers had zero experience with concrete or brick. The foam form lines up every brick, and our FREE plans walk you through each step. Still unsure? Read how hard it is to build a pizza oven.
In Their Own Words
The Chandler Family · Arizona★★★★★
Pizza or Orange Juice?
We used a pizza oven attachment for our grill. We learned how to make a pizza with it and we really enjoyed it. But it wasn’t a real pizza oven. We were ready for a real pizza oven. We started shopping for real pizza ovens. We looked at lots of prefabricated pizza ovens. We found ones we liked, but they were all too expensive. Luckily, we found the BrickWood Ovens website. The ovens shown in their gallery seemed to be exactly what we’d been looking for.
So, the process was started. Where would we build it? How would we build it? The only place in our backyard we could agree on to build it was where our beautiful orange tree was growing. Finally, in July we decided to cut down the orange tree and build a pizza oven in its spot. We started building the Mattone Barile Grande oven on August 2 and baked our first pizza in it on November 2.
The wife and I “had” zero experience in concrete work or brick laying. We live in Phoenix, Arizona and began the build during the hottest time of the year in order to have the oven ready for the winter months (probably not a great idea in hindsight).
Every weekend plus several vacation days for 2 months we worked on building the oven. We had to learn everything the hard way. We rented and bought lots of tools as well. Building the pizza oven was not an easy task for us. We made an incredible mess and it cost us a little over 2K to complete.
We took a lot of pictures along the way. Everyone who’s seen the oven, or a photo of it, says WOW! And now that it’s done, and we’ve used it for the first time, we are super happy with deciding to build it. And we can’t believe that we did such a nice job too!
It’s a big job. Buying an oven is WAY easier. But, it’s so worth it to build one if you can. Thank you!
P.S. We planted another orange tree too!
Your Turn
Build Your Own Backyard Oven
The Chandlers had never laid a brick, and they built one of the most photographed ovens in our gallery. Every one starts with the same kit and plans. Start with our free plans and materials list, then finish it your way. Ready to start? See Mattone Barile Grande · Package 2, or compare all of our pizza oven kits.


