




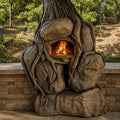


DIY Outdoor Kitchen: Cafe Rosalino, Dug Into a California Hillside
A red brick barrel oven, a stacked stone base, a long poured counter and a gas grill, all set into a nook the family dug out of their own hillside. Here is the whole build, photo by photo.

- Built By
- The Rosalino Family
- Location
- California
- Oven Style
- Fire Brick Barrel
- Photos & Videos
- 49 Photos · 1 Video
- Homeowner Review
- ★★★★★
Build Time-Lapse
Watch This DIY Outdoor Kitchen Come Together
From a dirt hillside to a fire roaring at Cafe Rosalino, in about 61 seconds. Press play, or grab the slider and scrub through the build yourself.

The Rosalino family built this DIY outdoor kitchen by digging a nook into the hillside behind their California patio. A block retaining wall holds back the slope, and inside it sit a red brick Mattone Barile Grande, a long poured concrete counter and a stainless gas grill. Here is how it came together, photo by photo.
Step 1 of 8
Digging Into the Hillside
The outdoor kitchen started as a small block-walled patio below a steep dirt hillside. The family dug straight into the slope with picks and shovels, then started a concrete block retaining wall to hold the hill back.


Step 2 of 8
Conduit, Rebar and a Footing Pour
Before any concrete, electrical conduit went in along the walls for lights and outlets. A gravel base, a rebar grid and vertical bars followed, then a towable mixer poured the footing for the whole kitchen.


Step 3 of 8
The Block Base and Hearth Slab
Pallets of block arrived and the oven stand and counter run went up on the footing, with an open bay left for firewood. Wood forms, rebar and a recessed center made the hearth slab, poured right on top of the stand.


Step 4 of 8
A Herringbone Firebrick Cooking Surface
A red brick border went around the edge of the hearth, a sand bed was screeded inside it, and the firebrick cooking surface went down in a herringbone pattern.


Step 5 of 8
Raising the Firebrick Barrel
The BrickWood foam form went on the firebrick cooking surface, and the family laid the firebrick barrel over it, row by row, with a brick chimney rising at the front.


Step 6 of 8
Insulation and Poured Counters
Ceramic fiber blanket went over the barrel, then wire mesh and a scratch coat. Meanwhile the long counter beside the oven was formed and poured in concrete.


Step 7 of 8
Red Brick Veneer, Row by Row
With the scratch coat on, red brick veneer went onto the barrel one row at a time. The joints were finished by hand and a stainless cap went on the chimney.


Step 8 of 8
First Fire at Cafe Rosalino
The first fire lit up the firebrick inside, a dial thermometer went over the door, and the oven got its name: Cafe Rosalino. A stainless gas grill finished the kitchen at the end of the counter.


Hover over the dots (or tap them on your phone) to see what makes this DIY outdoor kitchen one of a kind.
- Stainless Chimney CapA stainless cap tops the brick chimney.
- Dial ThermometerSet in the brick right over the door.
- Cafe Rosalino DoorA custom black door with the family's cafe name.
- Red Brick BarrelRed brick veneer laid row by row over the insulated firebrick barrel.
- Brick Hearth BandA soldier course of red brick finishes the hearth edge.
- Stacked Stone BaseDark stacked stone faces the block oven stand.
- Firewood BaySplit firewood stored right under the oven.
- Poured CounterThe long concrete counter runs off to the grill.
- Ivy WallIvy covers the retaining wall that holds back the hillside.

 BeforeFinished
Drag across the photo (or just move your mouse) to go from a dirt hillside and a chiminea to the finished outdoor kitchen.
Plan Yours
DIY Outdoor Kitchen Ideas From This Build
Dig in, don't build up. A sloped yard can hide a whole kitchen. A retaining wall turns the cut into a sheltered, ivy-covered backdrop.
Run conduit before the concrete. Lights and outlets are easy to add when the trenches are open, and almost impossible after the pour.
Make the oven the anchor. Put the oven at one end and run the counter to the grill, so you have prep space between both fires. Want the oven and kitchen ideas in one place? See this outdoor kitchen with pizza oven from Oregon.
Store firewood under the oven. An open bay in the stand keeps wood dry and right where you need it.
Good Questions
DIY Outdoor Kitchen FAQ
What is a DIY outdoor kitchen?
A DIY outdoor kitchen is a cooking area you build yourself outside: usually a block or masonry base, counters, and at least one cooker like a grill or a wood-burning oven. The Rosalino family built theirs around a red brick Mattone Barile Grande, a long poured concrete counter and a stainless gas grill.
Can you build an outdoor kitchen into a hillside?
Yes. The Rosalinos dug into the slope behind their patio and built a concrete block retaining wall to hold the hill back, then poured a reinforced footing for the oven stand and counters inside the cut.
Which oven kit did they use?
Mattone Barile Grande · Package 3. It is a fire brick barrel oven built over our foam form, and the Grande holds three 10" pizzas at once.
Do you need a footing for an outdoor kitchen?
For a masonry oven and block counters, yes. This kitchen sits on a poured concrete footing over gravel with a rebar grid, which keeps the heavy oven and counters from settling or cracking.
Where do you keep firewood in an outdoor kitchen?
Right under the oven. The family left an open bay in the block stand below the hearth slab, faced it in stacked stone and keep it full of split firewood.
Do I need masonry experience to build one?
No. The Rosalinos built the oven from our kit and FREE plans, laying the firebrick barrel over the foam form and then a red brick veneer on top. The plans walk you through every step.
Your Turn
Build Your Own DIY Outdoor Kitchen
The Rosalino family turned a dirt hillside into a backyard cafe with a Mattone Barile Grande at its heart. Every one starts with the same kit and plans. Start with our free plans and materials list, then finish it your way. Ready to start? See the Mattone Barile Grande, or compare all of our pizza oven kits.


