




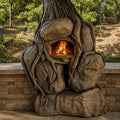


Outdoor Kitchen With Pizza Oven: The Mauery Family’s Covered Cortile Barile in Oregon
After ten years of Friday pizza nights on a stone, an Oregon family built a whole outdoor kitchen around a Cortile Barile: grill, fire pit, seating wall, a cedar roof and a gas burner of their own design. Every step is here, in 65 photos and a video.

- Built By
- The Mauery Family
- Location
- Oregon
- Oven Style
- Castable Refractory Barrel
- Photos & Videos
- 65 Photos + 1 Video
- Homeowner Review
- ★★★★★
Build Time-Lapse
Watch This Outdoor Kitchen With Pizza Oven Come Together
From a sketch on graph paper to gas flames under a cedar roof, in about 81 seconds. Press play, or grab the slider and scrub through the build yourself.

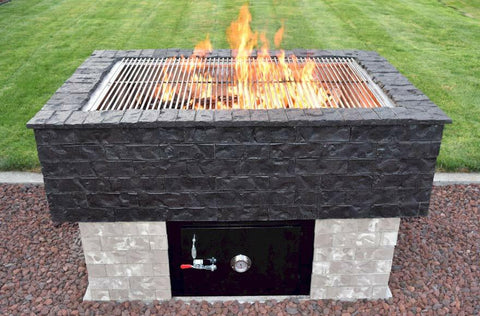
The Mauery family made pizza at home on a stone every Friday night for ten years. Then Vernon decided to level up. He loves to build things, and with a pizza oven he gets to enjoy the build every time he fires it up. It was his first masonry project, and he didn’t stop at the oven: he sketched a full outdoor kitchen with a grill, a fire pit, a seating wall and a roof over it all.
Step 1 of 7
A Sketch, Then Casting in the Garage
It started with a drawing on graph paper. The castable refractory and firebricks went into the garage, and Vernon packed the castable into the Cortile Barile foam molds piece by piece: the arch, the back wall and the barrel sections. Once they cured, the foam broke away and the cast pieces got a dry fit on a sheet of plywood. He also cast the hearth slab in sections, with foam board for insulation and a hole left for the gas line.
“I love to make things; building it is always half the fun.”
Vernon M.


Step 2 of 7
A New Patio and Footings
Out back, the yard was graded and marked out, a gravel base went down and the footings and curved patio edge were formed. Then the whole patio was poured in one go.


Step 3 of 7
Block Walls, Stone and the Hearth
Concrete block went up between the wood roof posts for the grill counter, the oven stand and a curved seating wall around the fire pit. Natural stone veneer was laid out and fitted, stainless doors went into the block, and the cast hearth slab was set on top of the oven stand with an open bay below for firewood.


Step 4 of 7
Firebrick Cooking Surface and a Custom Gas Burner
A steel angle frame on the hearth holds the herringbone firebrick cooking surface. With the cast back wall and arch in place, Vernon ran burner pipes along both sides of the firebrick cooking surface before the barrel went on top.


Step 5 of 7
Insulation and Stucco
With the flue collar on and the joints sealed, ceramic fiber blanket went over the whole barrel, then metal lath, then the first coat of stucco. By now the kitchen around it was taking shape too.


Step 6 of 7
A Cedar Roof and the First Gas Fire
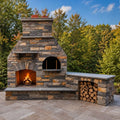
Rafters and cedar decking went up over the oven and grill, with the stainless chimney pipe running straight through the roof. The gas line and burner fittings were hooked up for the first gas fire, then the roof got shingles and a chimney cap.


Step 7 of 7
Wood or Gas, Pizza Night Is Ready
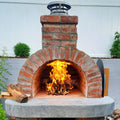
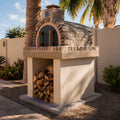
The oven got a gray arch face scored to look like a fan of arch stones, and a cedar door with stainless handles. It burns wood like any BrickWood oven, and with a turn of the knobs in the stone base the gas burner runs a line of flame down both walls. Watch it below. Vernon bakes bread too, so this oven will see more than Friday pizza.
“The oven is beautiful and functions well.”
Vernon M.


Hover over the dots (or tap them on your phone) to see what makes this outdoor kitchen with pizza oven work.
- Stainless ChimneyThe chimney pipe runs straight up through the cedar roof.
- Cedar RoofCedar decking and shingles keep the oven and grill covered.
- Scored Arch FaceA gray face scored to look like a fan of arch stones.
- Gas BurnerPipe burners along both walls of the firebrick cooking surface.
- Stone CapA gray stone cap on the hearth in front of the opening.
- Natural Stone BaseStone veneer over a concrete block stand.
- Gas ControlsKnobs in the stone base run the burner.

 BeforeFinished
Drag across the photo (or just move your mouse) to go from the bare cast oven to the finished one.
Good Questions
Outdoor Kitchen With Pizza Oven FAQ
What goes into an outdoor kitchen with pizza oven?
This one has a built-in grill, a Cortile Barile pizza oven, stainless storage doors, a curved stone seating wall and a fire pit, all on one concrete patio. The grill and oven sit under a cedar roof so the family can cook in any weather.
Can a pizza oven also run on gas?
The Mauerys added their own gas burner: pipe burners run along both sides of the firebrick cooking surface, the gas line comes up through a hole they cast into the hearth slab, and the controls sit in the stone base below. Our kits are designed as wood-fired ovens, and this one still burns wood too. If you add gas, have the line and burner installed and checked by a licensed gas professional.
Can you put a roof over a pizza oven?
Yes. Here the stainless chimney pipe runs straight up through the cedar roof and out a shingled roof with a cap on top, so the oven stays covered and dry.
Which oven kit did they use?
Cortile Barile · Package 1. The oven is cast from castable refractory in our foam molds, then set on a firebrick cooking surface.
Do I need masonry experience?
No. This was Vernon’s first masonry project, and he says it “turned out great.” Our FREE plans walk you through each step, and you can read how hard it is to build a pizza oven.
In Their Own Words
Vernon M. · The Mauery Family · Oregon★★★★★
Perfect oven for DIYers
I love to make things; building it is always half the fun. But with a pizza oven, I get to build the oven and then enjoy it every time I use it when I make pizzas.
We have been making pizzas at home in the oven on a stone every Friday night for ten years. This year, I decided to level up and build a pizza oven. I also love to bake bread, so this will work nicely for that as well.
The oven is beautiful and functions well. It was easy enough that it turned out great even though it was my first masonry project. We love our new BrickWood Oven.
Your Turn
Build Your Own Outdoor Kitchen
Vernon had never done masonry before, and he built an oven, a grill counter, a fire pit and a roof. Every one starts with the same kit and plans. Start with our free plans and materials list, then finish it your way. Ready to start? See Cortile Barile · Package 1, or compare all of our pizza oven kits.


