






Polished Concrete Countertops: How the Boglino Family Formed, Poured & Polished Their Hearth
Before a single firebrick went down, a Florida family built a two-layer concrete hearth with a curved front, then ground it smooth until the stone showed. Every form, pour and pass of the polisher is here, in 83 photos.

- Built By
- The Boglino Family
- Location
- Florida
- Oven Style
- Fire Brick Barrel
- Photos & Videos
- 83 Photos
- Homeowner Review
- ★★★★★
Build Time-Lapse
Watch the Polished Concrete Countertop and Oven Come Together
From a pallet of block to a finished oven on a polished hearth, in about 99 seconds. Press play, or grab the slider and scrub through the build yourself.

Most oven builds rush to the bricks. The Boglino family spent half of their 83 photos on the slab underneath. They formed and poured the hearth in two layers inside their screened patio in Florida, gave the countertop a curved front, then ground it until the stone in the mix showed. The firebrick barrel came after that, and it is a textbook build.
Step 1 of 8
A Block Base Inside the Screened Patio
The block, stone veneer and mortar came home on a trailer. A few pavers came up inside the screened patio for the footing, and the block walls went up in a U shape with an open bay in front for firewood. The family cat supervised. A wood form for the hearth slab went right on top of the finished base.


Step 2 of 8
The First Pour: An Insulated Hearth Slab
The first slab was formed on a plywood deck with rebar across it. A plastic-wrapped wood box sat in the middle so the pour would leave a recess. Once the concrete set and the box came out, the recess was filled with a pebbly insulating mix and floated flat by hand. That insulating layer is what the firebrick cooking surface sits on.


Step 3 of 8
The Second Pour: A Curved Concrete Countertop
Next came the slab you see in the finished photos. A second wood form with a curved front went on top of the first, with an inner form marking the oven’s footprint. Rebar was bent to follow the curve and tied in place, then the countertop concrete was poured, mounded over the steel and troweled smooth.


Step 4 of 8
Grinding and Polishing the Concrete Countertop
With the forms off, the countertop got a test fit of the barrel foam form, then the polisher came out. The top and the curved edge were ground down until the light stone in the mix showed through. Slate stacked-stone veneer went on the base below, with a cedar trim board under the slab edge.


Step 5 of 8
A Herringbone Firebrick Cooking Surface
A thin sand bed was screeded flat in the insulated recess, and the firebrick cooking surface went down in a herringbone pattern. The polished concrete frames it on every side.


Step 6 of 8
Laying the Firebrick Barrel Over the Foam Form
The firebricks were buttered with mortar and laid course by course right over the Mattone Barile Grande foam form, up to the crown. With the form out, the open barrel went on display before the back wall closed it in. The firebrick chimney started on top.


Step 7 of 8
Brick Arch, Insulation and Stucco
A second brick arch went in at the front over a wood arch form, which makes the oven opening a little smaller. Then ceramic fiber blanket went over the barrel, chicken wire over the blanket, and a scratch coat of stucco over the wire. The cream finish coat came last.


Step 8 of 8
Finished, Fired and Ready for Pizza
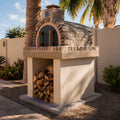
The finished oven sits on the paver patio with a red brick arch, a slate-clad chimney, an arched cedar door under a thermometer and firewood stacked below. Then came the first fires: marshmallows, a pizza sliding in at night and a margherita fresh out of the oven.


Hover over the dots (or tap them on your phone) to see what makes this oven and its polished concrete countertop work.
- Slate-Clad ChimneyA firebrick chimney on the barrel, clad in slate to match the base, with a cap on top.
- Cream Stucco BarrelCeramic fiber blanket, chicken wire, a scratch coat and a smooth cream finish coat.
- Red Brick ArchA second arch at the front that makes the oven opening smaller.
- Polished Concrete CountertopTwo pours, a curved front and a ground finish that shows the stone in the mix.
- Cedar TrimA cedar board under the slab edge between the countertop and the stone.
- Slate Stone BaseStacked slate veneer over a concrete block base.
- Firewood StorageAn open bay under the hearth keeps the wood dry and close.

 BeforeFinished
Drag across the photo (or just move your mouse) to go from the first hearth slab on the block base to the finished oven.
Good Questions
Polished Concrete Countertops FAQ
What are polished concrete countertops?
They are concrete slabs that are ground down after they cure, so the stone in the mix shows through as a smooth, speckled surface. The Boglinos used one as the hearth slab and counter around their oven.
Can a polished concrete countertop go under a pizza oven?
Yes. On this build the oven does not sit right on the polished surface. A recess was left in the middle of the slab and filled with an insulating mix, and the firebrick cooking surface and barrel sit in that recess. The polished concrete wraps around it as a counter.
How was this countertop formed and poured?
In two pours. The first slab went on the block base with a wood box set in the middle to leave a recess for the insulating layer. Then a second wood form with a curved front went on top, rebar was bent to follow the curve, and the countertop concrete was poured and troweled around an inner form for the oven.
How do you polish a concrete countertop?
Once the concrete has cured and the forms are off, the top and edges are ground with a concrete polisher until the stone in the mix shows. The photos in Step 4 show the grinding, and the close-up shows the finished speckled surface.
Which oven kit did they use?
A Mattone Barile Grande foam form. The firebrick barrel is laid right over the foam form, which comes out once the mortar sets.
Do I need masonry experience?
No. Our FREE plans walk you through each step, and you can read how hard it is to build a pizza oven.
In Their Own Words
The Boglino Family · Florida★★★★★
Thank you for great instructions and especially to the DIY-ers for sharing their creations in this gallery.
Your Turn
Build Your Own Oven and Hearth
The Boglinos poured and polished their own countertop, then laid a firebrick barrel right over our foam form. Every one starts with the same kit and plans. Start with our free plans and materials list, then finish it your way. Ready to start? See the Mattone Barile Grande foam form, or compare all of our pizza oven kits.


