




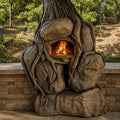


Built-In Pizza Oven: The Auldridge Family Carves a Cortile Barile Into a Rocky Texas Hillside
After five years of looking for the right spot, a couple outside Austin cut into the limestone hillside behind their house and built their oven right into the retaining wall. Every step is here, in 29 photos.

- Built By
- The Auldridge Family
- Location
- Texas
- Oven Style
- Castable Refractory Barrel
- Photos & Videos
- 29 Photos
- Homeowner Review
- ★★★★★
Build Time-Lapse
Watch This Built-In Pizza Oven Go Into the Hillside
From solid rock to a finished oven in the wall, in about 54 seconds. Press play, or grab the slider and scrub through the build yourself.

Phil and Dorothee Auldridge talked about a wood-burning oven at their home on the outskirts of Austin for at least five years. They knew they wanted one. They just could not decide where it should go. The answer turned out to be the rocky hillside behind the house. Phil wrote up the whole build for us, so this post is full of his tips.
Step 1 of 7
Digging Into a Limestone Hillside
Their covered patio is raised wooden decking, which Phil could not see holding a couple of tons of concrete and brick. The rest of the yard behind the house was already spoken for. So they picked the hillside and limestone retaining wall a few yards from the patio. With help from their “cheerful helper Alex,” they cut through mostly solid rock until the opening was clear.
“I just couldn’t see that as being an appropriate place for a couple of tons of concrete and brick.”
Phil Auldridge


Step 2 of 7
Casting the Cortile Barile
They chose the Cortile Barile because a stucco finish would blend with the limestone better than brick, and because casting the oven in foam forms looked easier than laying it brick by brick. They mixed the castable refractory, added the steel fibers as instructed and filled the forms. Phil’s tip: spend a lot of time poking the mix after you pour it to get rid of air bubbles. Once the forms are off, check every surface and trim any sharp steel fibers sticking out.
“Spoiler alert.. you will NOT be re-using these forms, and it does make a huge mess of styrofoam particles everywhere!”
Phil Auldridge

Step 3 of 7
A Slab That Cantilevers Out of the Wall
The concrete slab reaches out past the wall to leave a little work space in front, with rebar inside and a temporary wood frame holding up the overhang while it cured. To make the recess for the insulating layer, they poured to the depth of the supplied foam board, set the board in the middle and poured the rest. Once the slab set, the board came out and the center was filled with the vermiculite and mortar mix. A brick perimeter went on top, overlapping the insulated center.


Step 4 of 7
Firebrick Cooking Surface and Oven Assembly
Phil pre-cut every firebrick on a plywood platform that sat just inside the brick perimeter, so the edge bricks were easy to lift out and adjust. Then the whole platform came out, the opening got a sand bed about 1/4 inch high, leveled with a homemade screed board, and the bricks were tapped down level. The cast pieces were set and joined with high-temperature mortar, and leftover firebricks held the stainless flue down while the high-temperature silicone set.
“I do highly recommend renting a 14” diamond blade masonry saw to cut the bricks. It was well worth the additional expense.”
Phil Auldridge


Step 5 of 7
Ceramic Blanket and Chicken Wire
A straight razor blade cut the ceramic blanket cleanly. A little leftover high-temperature silicone and a few bricks held it in place. A 48-inch roll of chicken wire covers the whole depth of the oven in one piece. Phil left about 3 inches at the bottom to hold down with bricks and about 2 inches past each end to fold over the insulation, then cut end pieces with slits so they would bend into place. No tie wire needed. He just wrapped the wire ends around each other.
“Don’t waste ANY of the blanket, as there is just enough in the roll to complete the task.”
Phil Auldridge


Step 6 of 7
Two Coats of Stucco, Then the Hardest Wait
Phil had never worked with stucco and expected a mess. Instead it was easy: the fibers hold the mix together and it stays workable much longer than mortar. His must-have tools are a mortar board, a plastic trowel for the scratch coat, a scratching tool to score it, and a metal trowel for a smooth finish coat. Then came the hard part. They painted before the first fire so smoke would not keep the paint from sticking, and the elastomeric masonry paint called for a 30-day cure first. Two coats later, it was done.
“The painting instructions called for allowing the stucco to dry and cure for 30 days, which was like a prison sentence for us!”
Phil Auldridge


Step 7 of 7
Built Into the Wall, Ready for Pizza
After 9 long months, the oven was finished. Before rebuilding the stone wall around it, Phil added drain pipes at each lower corner and set low-voltage LED lights into the wall for nighttime pizza parties.
“It took a lot of work, but now we can enjoy the fruits of our labor. Bring on the beer!”
Phil Auldridge


Hover over the dots (or tap them on your phone) to see what makes this built-in pizza oven work.
- Stainless ChimneyA stainless flue and cap, sealed to the cast barrel with high-temperature silicone.
- Painted Stucco BarrelTwo coats of stucco over insulation and chicken wire, then two coats of elastomeric masonry paint.
- Cast Arch OpeningThe Cortile Barile front piece, cast from the foam form.
- Brick BorderA brick perimeter around the firebrick cooking surface and insulated hearth.
- Cantilevered SlabReinforced concrete that reaches out past the wall for a little work space.
- Limestone WallThe original retaining wall, rebuilt around the oven with drain pipes at the lower corners.
- The HillsideThe back of the oven sits right in the rock they dug out.

 BeforeFinished
Drag across the photo (or just move your mouse) to go from the hole in the limestone wall to the finished oven.
Good Questions
Built-In Pizza Oven FAQ
What is a built-in pizza oven?
It is an oven built into something permanent, like a wall, an outdoor kitchen or, in this case, a hillside, instead of standing on its own base. The Auldridges set theirs into a limestone retaining wall on a slab that cantilevers out from the wall.
Can you build a pizza oven into a retaining wall?
Yes. The Auldridges cut an opening through the wall and the rock behind it, poured a reinforced slab that reaches out past the wall, built the oven on it, then rebuilt the stone around it with drain pipes at each lower corner.
Why did they choose a cast oven instead of brick?
A stucco finish blends with the limestone better than brick would, and casting the Cortile Barile in foam forms looked easier than laying the oven brick by brick.
How long did the build take?
About 9 months, start to finish. That included a 30-day wait for the stucco to cure before it could be painted.
What tools does Phil recommend?
Rent a 14-inch diamond blade masonry saw for the firebricks. For stucco, use a mortar board, a plastic trowel for the scratch coat, a scratching tool and a metal trowel for the finish coat. A straight razor blade cuts the ceramic blanket cleanly.
Do I need masonry experience?
No. Phil had never worked with stucco and found it “very easy to work with.” Our FREE plans walk you through each step, and you can read how hard it is to build a pizza oven.
In Their Own Words
The Auldridge Family · Texas★★★★★
My wife and I have been talking about how to make a wood fired oven in our limestone hillside for at least 5 years. After much consideration, we chose the Cortile Barile style pizza oven kit.
We have had lots of time to research and explore other oven options and I’m absolutely convinced that these plans, and this oven is one of the best available.
It took a lot of work, but now we enjoy the fruits of our labor.
Your Turn
Build Your Own Built-In Oven
Phil had never worked with stucco, and he cast an oven into solid rock. Every one starts with the same kit and plans. Start with our free plans and materials list, then finish it your way. Ready to start? See Cortile Barile · Package 1, or compare all of our pizza oven kits.


