


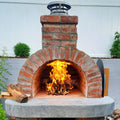


Square Pizza Oven: The Olson Family’s Minnesota Build
Frost footings dug 48 inches into clay, a block base strong enough to “withstand a tornado,” and a bricked-in square front that gives this square pizza oven its look. One Minnesota couple, a lot of weekends, and a lot of mortar.

- Built By
- The Olson Family
- Location
- Minnesota
- Oven Style
- Fire Brick Barrel
- Number of Photos
- 27
- Cooking Surface
- 996 sq in
Build Time-Lapse
Watch This Square Pizza Oven Get Built
From a garden hose outline on the lawn to a fire glowing behind a square brick front, in about 48 seconds. Press play, or grab the slider and scrub through the build yourself.

Jennifer Olson and her husband decided to build their own oven because, in her words, “we love fires, outdoors and entertaining.” They learned the masonry as they went. They picked the insulated Mattone Barile Grande because it is large enough to bake multiple pizzas, and because the outside does not get hot, so the kids would not get burned if they touched it. Then they finished it with a bricked-in square front, which is what makes it a square pizza oven. Here is how they did it, told in Jennifer’s own words wherever we could.
Step 1 of 7
Frost Footings for a Minnesota Winter
First they needed a spot. They wanted the oven close enough to the house to check on easily, with room for a patio for entertaining. They built a template out of boards the size of the oven and moved it around the yard until it felt right, and decided to add a counter top on each side for work space.
Because they live in Minnesota, they added frost footings. The plans do not call for them, but they worried cold winters would heave the slab and eventually crack the oven. Their soil is clay, so it took an entire weekend to hand dig into the hill. For the footings they rented a gas auger and drilled 8 holes, 48 inches deep, with 4 pieces of rebar in each one.
They rented an electric mixer too, and were very glad they did. The footings and slab took 51 bags of concrete mix, at 60 pounds each. After troweling it smooth, they let it cure for a few weeks.


Step 2 of 7
A Square Block Base (Built to Last)
Once the slab was dry, they drilled holes for rebar so every opening in the block would have a piece of rebar in it. “We did not want these blocks to go anywhere!” They laid the block along lines drawn on the slab, 5 courses for the oven and 4 for the counters on each side, including an angled counter on the right.
“If they can do it so can we, we will just have to be creative!”
Jennifer Olson
Jennifer’s advice: check every block for level, both horizontally and vertically. A small mistake can be made up on the next course. Looking back, she wishes they had gone up only 4 courses on the oven, because the layers added later make the finished oven quite tall. When the block was done, every core was filled with concrete around the rebar.
“This oven could withstand a tornado for sure!”
Jennifer Olson


Step 3 of 7
The Hearth: Foam Void, Reclaimed Brick and Firebrick
Instead of building the hearth form on the ground and lifting it up, they built it in place on top of the block, with help from Jennifer’s father-in-law. A piece of foam inside the form created a void. Once the surrounding concrete was hard, the foam came out in pieces and the space was filled with a concrete and vermiculite mix that insulates the firebrick cooking surface.
For the hearth border, they used brick left over from building their house 13 years earlier, which had been stored at the grandparents’ house. Sand went down inside the border so the firebrick cooking surface would sit level with it, and the firebrick was laid in a herringbone pattern, fitted tightly with no mortar.


Step 4 of 7
Building the Oven Over the Foam Form
“This was an exciting day,” Jennifer wrote, when they finally opened the box from BrickWood with the foam form. They mixed their own fire mortar following the BrickWood directions: fire clay, Portland cement, silica sand and lime. Each firebrick soaked in water for 20 minutes so the mortar would stick better, and the ridges on the form showed exactly where every joint goes.
The back wall was laid like regular brick, working out from the middle. Around the chimney opening they used 4 bricks for each layer, topped with the BrickWood chimney kit.


Step 5 of 7
Insulation, Lath and Stucco
Next came two layers of the BrickWood insulation blanket. Her tip: wear gloves and a mask. It was hard to cut, but once it was on, they could mold it into place by hand. Metal lath went over the insulation, wired in place to give the stucco something to grab.
The first stucco coat did not need to be pretty. About a week later, with everything dry, the foam form came out. “We are definitely messy masons!”


Step 6 of 7
The Square Front That Makes It a Square Pizza Oven
For the part everyone would see, they asked a neighbor to help. Together they bricked in the front of the oven into a square face and closed off part of the opening to help hold in heat, using regular mortar for the facing brick. A landscaper did the final stucco coat with a color additive to match the brick.
They covered the block base in stone veneer, with guidance from another neighbor, and topped each side counter with a large piece of bluestone, much less expensive than granite or limestone.

Hover over the dots (or tap them on your phone) to see what makes this square pizza oven one of a kind.
- Brick Chimney Surround4 bricks per layer around the opening, topped with the BrickWood chimney kit.
- Square Brick FrontBricked in with a neighbor’s help, turning the barrel’s round face into a square one.
- Smaller OpeningPart of the front was closed off to help the oven hold its heat.
- Color-Matched StuccoThe final coat has a color additive to match the brick.
- Bluestone CountersWork space on each side, much less expensive than granite or limestone.
- Stone Veneer BaseStone veneer covers the block, with the joints filled using a grout bag.
Step 7 of 7
First Fire and a Patio for Pizza Parties
For the first firings they followed BrickWood’s instructions to dry the oven out slowly over 6 days, so the bricks would not crack. A local company designed and installed the patio around it. “We are now all ready for our first Pizza party!”

 Day 1Finished
Drag across the photo (or just move your mouse) to go from a dug-out clay hillside to a finished square pizza oven.


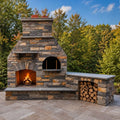
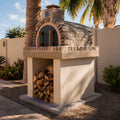
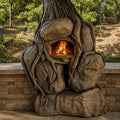
A Full Square Brick Enclosure
Want to take the square look all the way? Every one of these starts the same way: with the same kit and plans.

In Her Own Words
Jennifer Olson · Minnesota
We decided to build a pizza oven because we love fires, outdoors and entertaining. We used brickwoodovens as our resource. They provided us with a detailed instruction manual on how to build the oven and an online store to purchase some of our materials. The owner of the company was also a wonderful resource and very helpful when we had questions along the way. We could not have completed this project without them.
We decided to build the Insulated Mattone Barile Grande. I am glad that we went with that choice because it is large enough to bake multiple pizzas and we like the fact that the outside does not get hot so our kids would not get burned if they touch it.
Your Turn
Build Your Own Square Pizza Oven
The Olsons learned the masonry as they went, and they finished one of the most elegant ovens in our gallery. Every one starts with the same kit and plans. Start with our free plans and materials list, then square it off with a brick front of your own. Ready to start? See the Mattone Barile Grande pizza oven kit or compare all of our pizza oven kits.


